Showing posts with label chocolate. Show all posts

Saturday, January 21, 2012

Our Little Secret

They vanished.  A whole pan full of them just vanished.  I set them out on the picnic table and they vanished.  It's no wonder really.  After all, they are the perfect snack - crispy & gooey at the same time, sweet, chocolaty, and easily justifiable (you know, as a "protein" dish).

My cousin, Diana, showed me how to make them.  So easy!  I thought it was a recipe she had made up.  I had NO idea that they had a 'real' name.  She called them Crispy Dudes.  That's the only name I've ever known.  It turns out that the rest of the world HAS heard of them.  Only, they're call Scotcheroos.  I have to say I was a little crushed to find out that I didn't have a secret recipe.


Imagine my surprise the first time I took them on a camping trip.  I'm picturing the look on people's faces as I gently peel back the aluminum foil from my pan to reveal my secret recipe sweet snack.  Instead of oohs and aahs, I get "Oh, cool, Scotcheroos."

And that's when it happened.  The whole pan just disappeared.  Well, not the actual pan.  Just the Crispy Dudes.  Vanished.


They are simple as pie to make - actually, they are much simpler than pie!  You just melt some corn syrup with some sugar.  When that's all warm and syrupy you add some peanut butter.  Once that's all gooey, you add the Rice Crispies and press it into a pan. Melt chocolate and butterscotch chips and pour that on like frosting. Ta-dah! Crispy Dudes!  Oh, the hardest part of the recipe comes next...you have to wait for them to cool and firm up.


A word of advice.  When you make these, you should always cover them with aluminum foil.  Not for the reasons you might imagine, though.  You need to cover them, first, so no one will know what you brought to the party (make them wait for the big 'reveal') and, second, so no one will know how many you've eaten (I seem to have a problem staying out of them myself).  Keep 'um covered, people!  It's our little secret.  Shhh!


Crispy Dudes

INGREDIENTS

1
cup corn syrup
1
cup granulated sugar
1
cup creamy peanut butter
6
cups Rice Krispies cereal
1
cup semi-sweet chocolate chips
1
cup butterscotch chips

Directions
1. In a large saucepan, cook corn syrup and sugar over medium heat, stirring frequently, until mixture begins to boil.  Remove from heat.  Stir in peanut butter.  Mix in cereal.  Press in buttered 13 x 9 x 2-inch pan.
2. Melt semi-sweet chocolate chips and butterscotch flavored chips in microwave (30 seconds at a time, stirring between times) until smooth.  Spread over cereal mixture.
3. Chill until firm (15 minutes).


Wednesday, June 1, 2011

It’s bread, trust me

I like having a vegetable garden.  I do not like preparing the garden ground.  I do not like planting the garden.  I do not like waiting for the seeds to sprout.  I do not like thinning the plants.  I do not like weeding the garden.  I do not like watering the garden.  I do not like plucking the slugs out of the garden.  But, I do like ‘having’ a garden.  It’s very satisfying to wander out there and pick beautiful produce just before I start preparing dinner.

Early on in my marriage (back when I could convince my husband with a few bats of my eyelashes that he loved me enough to make me a garden) we had a good looking garden.  He bought wood and built raised beds.  He rototilled the earth.  He brought in bags of steer manure (can anyone tell me what’s inferior about cow manure?...just asking) and spread it over the freshly turned dirt.  He rototilled it again.  He decided it needed peat moss.  He rototilled it again.  He bought seed packets (off my list).  He planted the seeds.  He carefully marked the rows in each bed with the empty seed packets.  He watered.  He waited.  He plucked the slugs.  It was a gorgeous garden!

There was only one problem.  I’m still not sure how this happened.  One day we had this beautiful vegetable garden and the next day we had a truckload of zucchini each one the size of a small boat!

My mother used to say that one zucchini plant in a garden was a half a plant too many.  I never understood what she meant until that year.  Oh, she was so right!  Suddenly, we were eating zucchini at every meal.  I was scouring my recipe collection and cookbooks for new zucchini recipes.  We ate zucchini omelettes for breakfast, zucchini patties for lunch, and stuffed zucchini for dinner.  I couldn’t think of enough ways to use it all up.


On my infrequent trips to the market for other items, I would see zucchini for sale in the produce section and I was appalled to see what they were charging for them.  I was often tempted to check the parking lot for unlocked cars so I could sneak my extras in someone’s back seat while they were shopping.  Shoot, on my most desperate days, I would have happily paid people to take zucchini home.

I decided to freeze zucchini.  The shredding and bagging and sealing began.  Then the freezer got full.  The zucchini was piling up in my kitchen.  And, my husband just kept bringing them in.  Things were getting ugly.  Then one day, when I was complaining about my bumper crop at work, a friend said the magic words “Zucchini Bread”.
And that’s how I ended up with five zucchini bread recipes.  I sat down and started calling all my girlfriends.  Each one had one and they were all pretty much the same, with slight variations.  However, I should have known something was up when I called Mary, and she started snickering.  She started down the list of ingredients with me transcribing as fast as I could.  Every couple of seconds, she’d giggle again.  Having no idea why, I just kept writing.  I did my first double-take when she said the words ‘cocoa powder’.

Me:  “Mary, I want your zucchini bread recipe, not cake.”
Mary:  “It is zucchini bread.” (still tittering)
Me:  “Are you sure?”
Mary:  “Yes.  It’s bread, trust me.”

We continued with the recipe.  My second double-take came after the words ‘chocolate chips’.
Me:  “Mary, seriously, I want your zucchini bread recipe.  I don’t want a cake recipe.”
Mary:  “This is my zucchini bread recipe.”  (steady chuckling, now)
Me:  “Really?”
Mary:  “Yes.  It’s bread, trust me.”

By the time she uttered the words ‘pour into a prepared 9”x13” pan’, I knew it was hopeless.  But I tried one last time.

Me:  “Mary, this can’t be zucchini bread if it goes in a 9x13.”
Mary:   “Londa, it’s bread, trust me.  My recipe card says ‘bread’ and you can’t make me change my mind.”  (dead serious)
Me: “Okay, then. Bread it is.”

I’ve made this zucchini “bread” recipe many times in the intervening years since that phone conversation.  It has become my favorite zucchini “bread” recipe.  Who knows, it might become your favorite zucchini “bread” recipe, too.

Mary’s Zucchini “Bread”
INGREDIENTS
½   
cup butter
½  
cup oil
 
cup sugar
2
eggs
1
t vanilla
½
cup sour milk*
cups all-purpose flour
4
T cocoa powder
½
t baking powder
1
t soda
½
t salt
½
t cinnamon
½
t cloves
½
t nutmeg
2
cups shredded zucchini
1
small pkg semi-sweet chocolate chips
Directions 
1.     In the bowl of a large mixer, stir together butter, oil, sugar, eggs, vanilla, and sour milk.  Beat on med-low speed for two minutes.  In a separate bowl, mix together dry ingredients.
2.     Slow down mixer speed to low.  A bit at a time add dry ingredients to wet ingredients.
3.     Add zucchini.  Mix just enough to blend into batter.
4.     Pour into a prepared 9”x13” pan.  Top with chocolate chips.

5.     Bake in a 325°F oven for 45 minutes.

Thursday, May 26, 2011

Peppermint Trees

The instructions were simple.  The execution, well, not so simple.

Each holiday season ‘The Gang’ gets together to celebrate.  Some years we exchange gifts – with a twist.  For example, one year (we draw names) the gift had to cost exactly $20.01.  And you had to have a receipt to prove it.  Another year, we chose the color yellow (out of a hat) and all the gifts had to be yellow.  My favorite was when we decided that the gift had to be handmade.  I enjoyed making a quilted ‘doily’ for my best buddy, Sheila.

When the gift-giving lost its shine (ie we realized we had enough junk in our closets), we tried to come up with other things we could do together as a group.  We tossed around ideas of ‘sponsoring’ a family in need or going on a short trip together or participating in an activity together.  That’s when Sheila came up with this great idea of getting together to make holiday desserts together.  Well.  Anything with sugar in it works for me!

As I said, the instructions were simple: Find a holiday dessert recipe that you will make at the scheduled ‘event’.  We quizzed each other frequently to find out what everyone else was planning to make.  I was facing a Yule Log and Divinity, to name just two.  My dessert needed to be fancy enough to stand up to at least those two and who knows what the rest would be doing.


I love the Internet.  You can find almost anything there.  Off to one of my favorite recipe websites I went.  As I expected, I found the perfect recipe for the occasion, Peppermint Cream Brownie Torte.  Chocolate and mint.  Mmmm…I’m all dreamy just thinking about it.  Uh…give me a minute, I’ll be right back.  Ah!  There we go.  Ahem, where was I?  Oh, yes.  Well, I’m just sure God created those two plants at the exact same time (wasn’t it on Day 3 of the creation week?) and probably made sure they were growing right next to each other so that Adam & Eve (who came along on Day 6) would know they should be eaten together.  You know, kind of giving them a gentle shove in the right direction.  I mean, they had so many things to discover, I’m sure God built in little hints like this.  Don’t you think?  And this one would be pretty important to know right away!  Right?  Oh!  Back to the topic at hand:  Dessert.

My newly found recipe and my basket of ingredients showed up at the appointed day and time.  The rest of ‘The Gang’ all came through with fabulous dessert plans. It was organized chaos with everyone cooking at once (even the youngsters).  And what fun!  We had a great time baking together.  Lucy’s Yule Log was amazing, and yummy.  David’s Divinity turned out perfectly on the first try.  (I’m making a little ‘I’m in awe’ curtsy in his direction right now at the memory of it.)  My little brownie torte wasn’t bad.  I was proud of my efforts.  Even the chocolate/peppermint trees on top looked pretty good standing there in the sparkly ‘snow’. I only had to eat three of them (you know, the ones that flopped or broke).

So there you have it…

Peppermint Cream Brownie Torte

Close INGREDIENTS
Brownie

1
box (1 lb 2.4 oz) Betty Crocker® Original Supreme Premium brownie mix
Water, vegetable oil and eggs called for on brownie mix box (for cakelike brownies)

Peppermint Cream

1/2
cup whipping (heavy) cream
1/2
package (8-ounce size) cream cheese, softened
1/4
cup powdered sugar
1/2
teaspoon peppermint extract

Dark Chocolate Ganache

1/4
cup whipping (heavy) cream
1/2
cup semisweet chocolate chips

Chocolate Trees

cup semisweet chocolate chips
1
teaspoon shortening

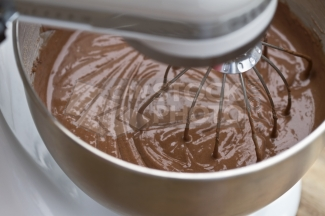
1.    1 Heat oven to 350°F (325°F for dark or nonstick pan). Line13x9-inch pan with foil, letting foil hang 2 inches over ends of pan. Spray foil with cooking spray. Make brownie mix as directed on box for cakelike brownies. Spread batter in pan. Bake 26 to 30 minutes or until toothpick inserted 2 inches from side of pan comes out almost clean. Cool completely, about 1 hour.

2.    2 Meanwhile, in medium bowl, beat 1/2 cup whipping cream with electric mixer on high speed until soft peaks form; set aside. In medium bowl, beat remaining Peppermint Cream ingredients on low speed until blended; beat on medium speed until smooth. Gently stir whipped cream into cream cheese mixture.

3.    3 In 1-quart saucepan, heat 1/4 cup whipping cream over low heat until hot but not boiling; remove from heat. Stir in 1/2 cup chocolate chips until melted. Let stand at room temperature about 1 hour or until slightly thickened.

4.    4 Remove brownies from pan, using foil to lift. Cut brownies crosswise to make 3 equal rectangles. Trim sides if desired.

5.    5 To assemble torte, place 1 brownie rectangle on serving platter; spread with 2/3 cup Peppermint Cream. Top with second brownie rectangle; spread with Dark Chocolate Ganache. Top with third brownie rectangle; spread with remaining cream. Refrigerate uncovered until serving.
6.    6 Meanwhile, place a piece of cooking parchment or waxed paper on cookie sheet. Draw 1 1/2- to 2-inch tree outlines or trace around 2-inch tree-shaped cookie cutter, leaving 1/2 inch space between each tree. Center toothpick at bottom of and 1/2 inch into each tree outline. In 1-quart saucepan, heat 1 cup chocolate chips and the shortening over low heat, stirring constantly, until chips are melted. Pour chocolate into decorating bag fitted with plain tip or resealable plastic bag; snip one corner. Starting at top of each tree outline, pipe chocolate over tree and end of toothpick within tree; fill center with random, squiggly lines. Refrigerate until chocolate hardens. Gently remove trees from paper; refrigerate until serving.

7.    7 Just before serving, sprinkle torte with candies and arrange Chocolate Trees on top. Store covered in refrigerator.

Wednesday, May 25, 2011

I'll bring dessert

I'll bring dessert."  The words were out of my mouth before I could think it through.  If I had thought it through, I probably wouldn't have picked dessert.

Being invited to lunch at someone's home is always followed by "What can I bring?"  That's just the way I was raised.  Mom drilled those words into my head.  And I've come to love the unexpected possibilities of uttering those words.  But in this case, I really should have spent that split-second more time before opening my mouth.  It was too late to take them back.  The search was on for an easy, yet "it looks complicated" dessert.

You'd have to see my kitchen to understand how silly this next sentence sounds.  Instead of looking through my cookbooks and cooking magazines, I hopped on the computer and started an Internet search for a dessert recipe.  My kitchen is small.  But even with that limitation (and trust me, it's a limitation!), I have devoted three (yes, count them, three!) kitchen shelves to my cookbook, cooking magazine, and recipe clippings collections.  There are stacks of cookbooks beside the microwave.  There are file folders and shirt boxes full of recipes I've clipped out of magazines and newspapers.  There are cooking magazines like Everyday Food, Cook's Country, Food Network Magazine, Martha Stewart Living, Bon Appetit, Food & Wine...shall I go on?...hiding in every nook and cranny I can find.  Then, just to bring everything into perspective, there's a sign high up on top of the highest cupboard that says, "I can cook, I just don't".  As icing on the cake (so to speak), my husband found a comic in the Sunday paper a few months ago that he clipped and posted on the side of the refrig.  It shows a woman (not unlike myself) sitting at her kitchen counter with cookbooks spread out everywhere, recipe clipping dripping off the counter top, and her eyes glued to her computer monitor.  The small child at her side asks, "What's for dinner, Mom?"  The woman speaks without looking up, "Hot dogs, I'm busy reading recipes."  My husband thinks it's hilarious.  I get the irony, but I'm not laughing.

The specifications for dessert were:  Chocolate & Fruit.  Well, chocolate is easy.  Fruit, on the other hand, can be tricky.  My fav is, and always will be, Raspberries.  A quick e-mail to a fellow recipe collector got me some ideas.  The Internet search began in earnest.  And, as expected, results came pouring in.  Knowing my friends taste in desserts, I was pretty sure that cheesecake would have to be part of the picture.  And, something lemon.  The sorting and sifting through the pile of results wasn't going to be fast.

Surprisingly, I was wrong.  The 'sort' went like this:  Chocolate and raspberries.  Lemon and cheesecake.  Oh!  Raspberries on lemon cheesecake.  Oh...I have to make two desserts.

That's how I ended up bringing two desserts to lunch -- Decadent chocolate cake with raspberry sauce AND Citrus cheesecake with raspberries.

Here they are (thanks to Betty Crocker):


Decadent Chocolate Cake with Raspberry Sauce

Ingredients:
Cake


1
cup semisweet chocolate chips (6 oz)
1/2
cup butter or margarine
1/2
cup Gold Medal® all-purpose flour
4
eggs, separated
1/2
cup sugar
Sauce
1
box (10 oz) frozen raspberries, thawed, drained and juice reserved
1/4
cup sugar
2
tablespoons cornstarch
1
to 2 tablespoons orange- or raspberry-flavored liqueur, if desired
Glaze


1/2
cup semisweet chocolate chips
2
tablespoons butter or margarine
2
tablespoons light corn syrup

Garnish
 
1/2
cup whipped cream
Fresh raspberries, if desired
1.    1 Heat oven to 325°F. Grease bottom and side of 8-inch springform pan or 9-inch round cake pan with shortening. In 2-quart heavy saucepan, melt 1 cup chocolate chips and 1/2 cup butter over medium heat, stirring occasionally. Cool 5 minutes. Stir in flour until smooth. Stir in egg yolks until well blended; set aside.

2.    2 In large bowl, beat egg whites with electric mixer on high speed until foamy. Beat in 1/2 cup sugar, 1 tablespoon at a time, until soft peaks form. Using rubber spatula, fold chocolate mixture into egg whites. Spread in pan.

3.    3 Bake springform pan 35 to 40 minutes, round cake pan 30 to 35 minutes, or until toothpick inserted in center comes out clean (top will appear dry and cracked). Cool 10 minutes. Run knife along side of cake to loosen; remove side of springform pan. Place cooling rack upside down over cake; turn rack and cake over. Remove bottom of springform pan or round cake pan. Cool completely, about 1 hour.

4.    4 Meanwhile, add enough water to reserved raspberry juice to measure 1 cup. In 1-quart saucepan, mix 1/4 cup sugar and the cornstarch. Stir in juice and thawed raspberries. Heat to boiling over medium heat. Boil and stir 1 minute. Place small strainer over small bowl. Pour mixture through strainer to remove seeds; discard seeds. Stir liqueur into mixture; set aside.

5.    5 Place cake on serving plate. In 1-quart saucepan, heat glaze ingredients over medium heat, stirring occasionally, until chips are melted. Spread over top of cake, allowing some to drizzle down side. Place whipped cream in decorating bag fitted with star tip. Pipe a rosette on each serving. Serve cake with sauce. Garnish with fresh raspberries.

Citrus Cheesecake with Berries
Ingredients:
Citrus Crust
1
cup Gold Medal® all-purpose flour
1/2
cup butter or margarine, softened
1/4
cup sugar
1
tablespoon grated lemon peel
1
egg yolk
Filling
5
packages (8 oz each) cream cheese, softened
1 3/4
cups sugar
3
tablespoons Gold Medal® all-purpose flour
1
tablespoon grated orange peel
1
tablespoon grated lemon peel
1/4
teaspoon salt
5
eggs
2
egg yolks
1/4
cup whipping cream
Topping
3/4
cup whipping cream
1/2
cup fresh raspberries

1.    1 Move oven rack to lowest position. Heat oven to 375°F. Lightly grease 10-inch springform pan. In medium bowl, mix all crust ingredients, using hands. Press one-third of mixture evenly on bottom of pan. Press remaining mixture halfway up side of pan. Bake 8 to 10 minutes or until light golden brown.
2.    2 In large bowl, beat cream cheese, 1 3/4 cups sugar, 3 tablespoons flour, the orange peel, lemon peel and salt with electric mixer on medium speed about 1 minute or until smooth. Beat in eggs, 2 egg yolks and 1/4 cup whipping cream, beating on low speed until well blended. Pour into baked crust (pan will be full). Bake 20 minutes.
3.    3 Reduce oven temperature to 300°F. Bake about 35 minutes longer or until center is set. (Do not insert a knife because the hole could cause cheesecake to crack.) Turn off oven and leave cheesecake in oven 15 minutes. Cool in pan on cooling rack 15 minutes.
4.    4 Run knife around side of pan to loosen cheesecake. Refrigerate uncovered about 3 hours or until chilled; cover and continue refrigerating at least 9 hours but no longer than 48 hours.
5.    5 Run knife around side of pan to loosen cheesecake; carefully remove side of pan. In chilled small bowl, beat 3/4 cup whipping cream with electric mixer on high speed until stiff. Spread whipped cream over top of cheesecake. Garnish with raspberries. Store in refrigerator.